

Prerequisites
Before you start, make sure you have:1
Account and Access
You need:
- ✅ A JTL ID (your login to the JTL ecosystem)
- ✅ Access to an organization (tenant) in the Partner Portal (created automatically on first login if you don’t have one yet)
- ✅ JTL-Wawi installed and running locally
2
Tools Installed
You’ll need the following tools installed on your machine:
1. Create the Project Using Cloud Apps CLI
- Ok to proceed? (y):
y - App name:
my-jtl-app - Description:
My JTL Sample App - Frontend:
React (Vite + Tailwind + JTL UI) - Backend:
Node.jsor.NETorPHP
2. Install Dependencies
From the project root, install all dependencies:3. Register your App
Theregister command signs you in with your JTL ID and lets you select a tenant. It then registers the app and writes the generated credentials to your local environment file. From the project root, run:
- Register the app in which tenant? Pick the tenant you want the app registered under. If your account has access to more than one, the CLI lists them all.
- Review. The CLI prints a summary of the app it is about to create:
App name,Technical name,Version,Description,Tenant, andAction. Verify the values are correct. - Create app “<app-name>” in tenant “<tenant>”? Select
Create the appand confirm.
The backend file carries the credentials your server uses and the endpoints it talks to:
The frontend file carries the values the auth provider needs:
The CLI also returns a link to the app in JTL Hub.
4. Start the App
Run the following command from the root directory to start the development server:5. Open the App
Open http://localhost:3004 in your browser. You should see an instruction page. It’s intentional, as the sample app is designed to run inside the JTL Cloud.6. Verify the Connection
Your app is now running locally and connected to the JTL platform using your credentials. To verify everything is working:- Open JTL Hub in your browser
- Navigate to the Manage apps menu and click the Apps in development tab
- You should see the
my-jtl-applisted
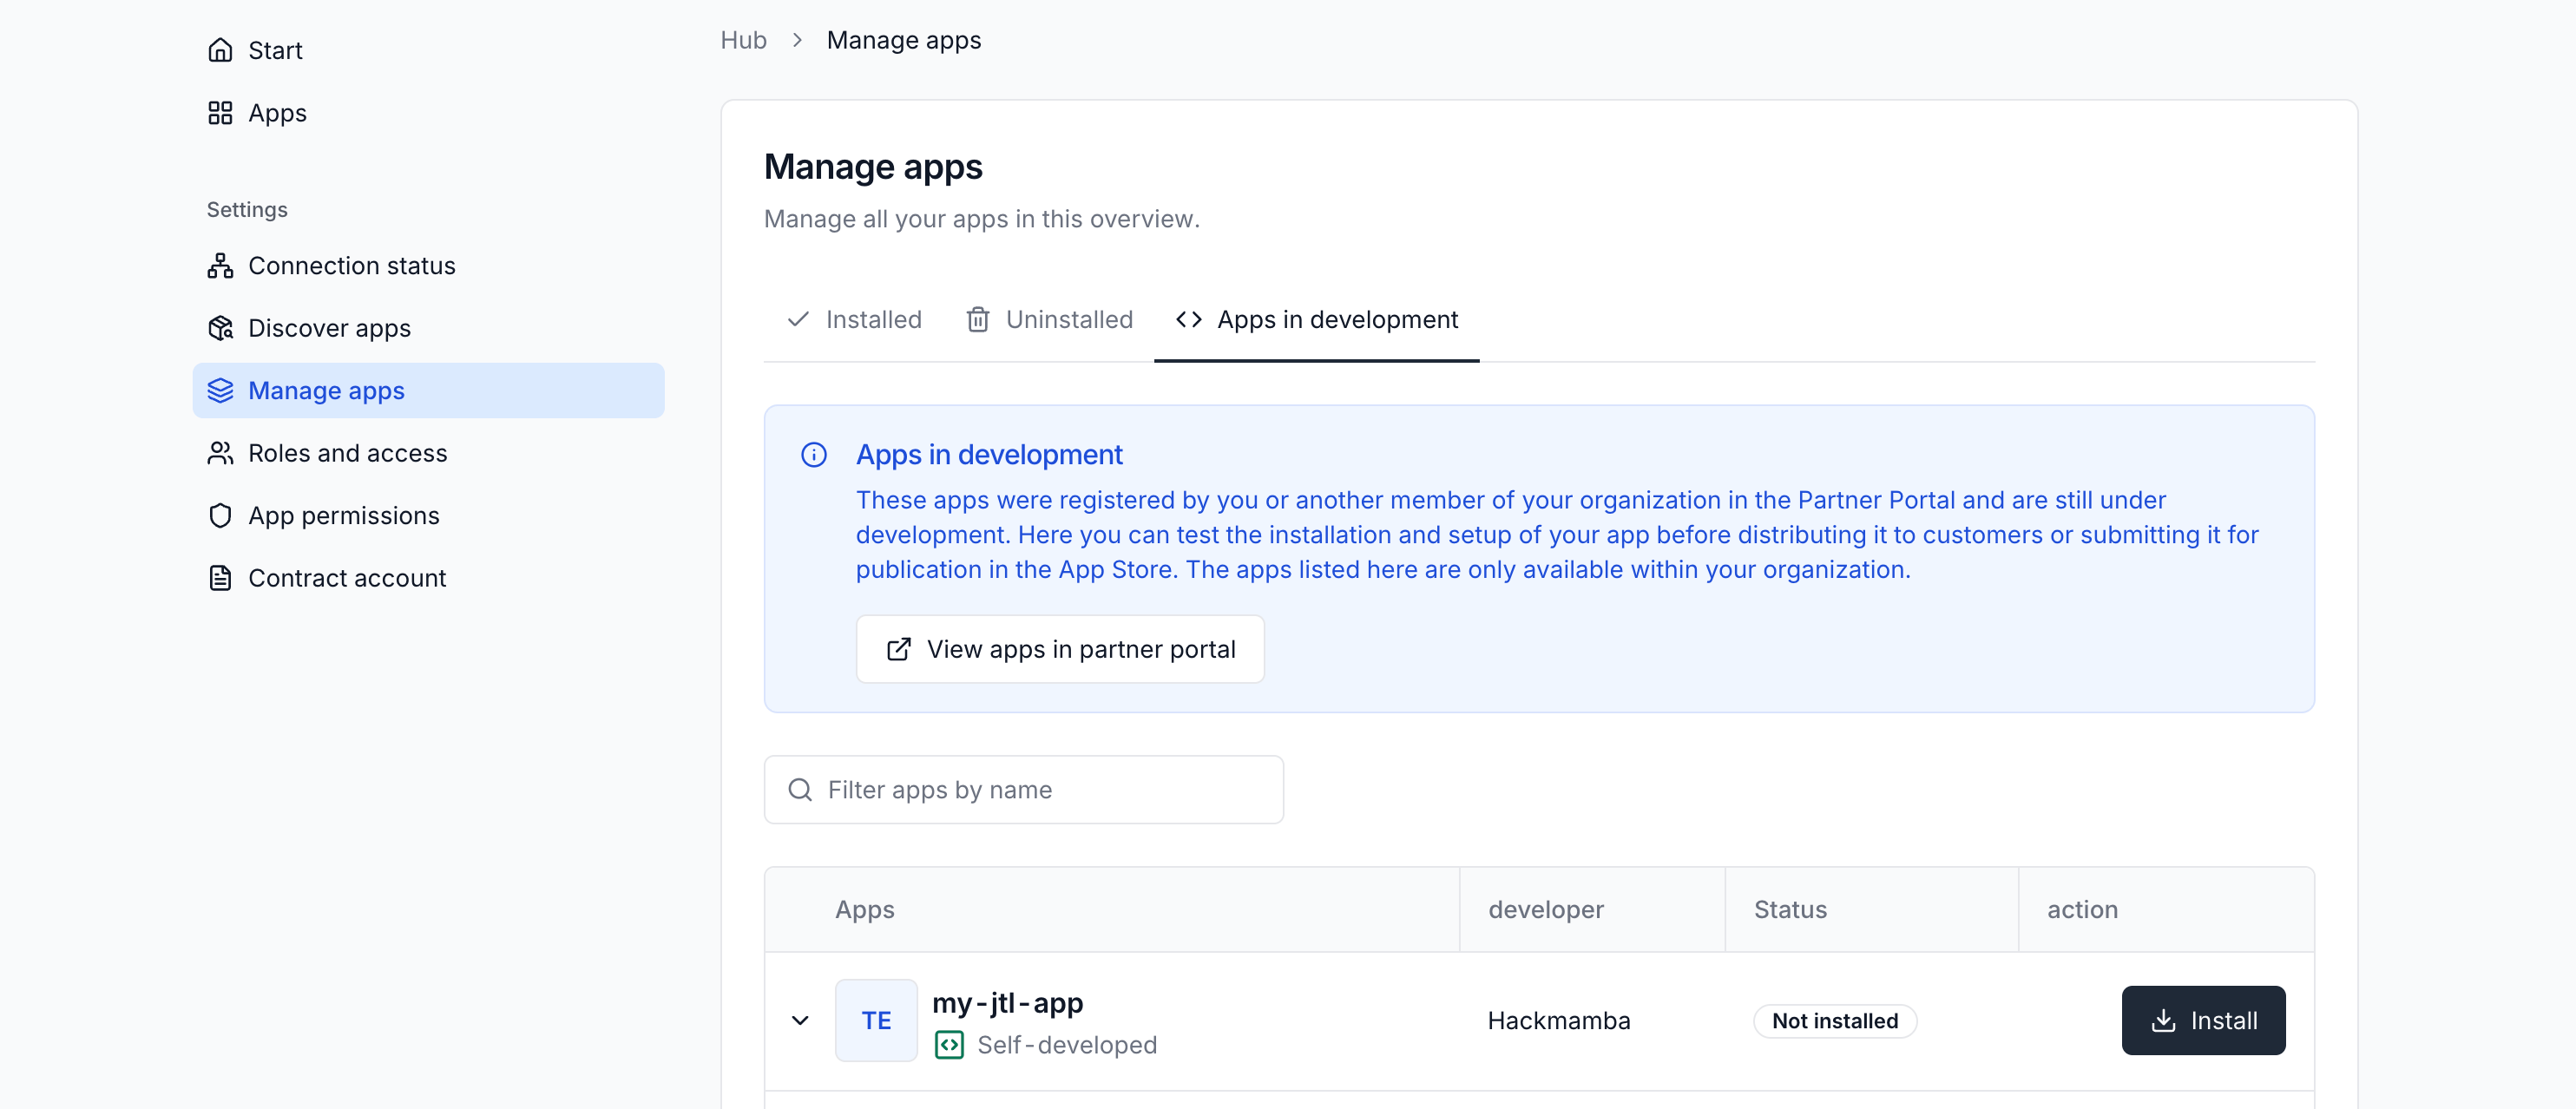
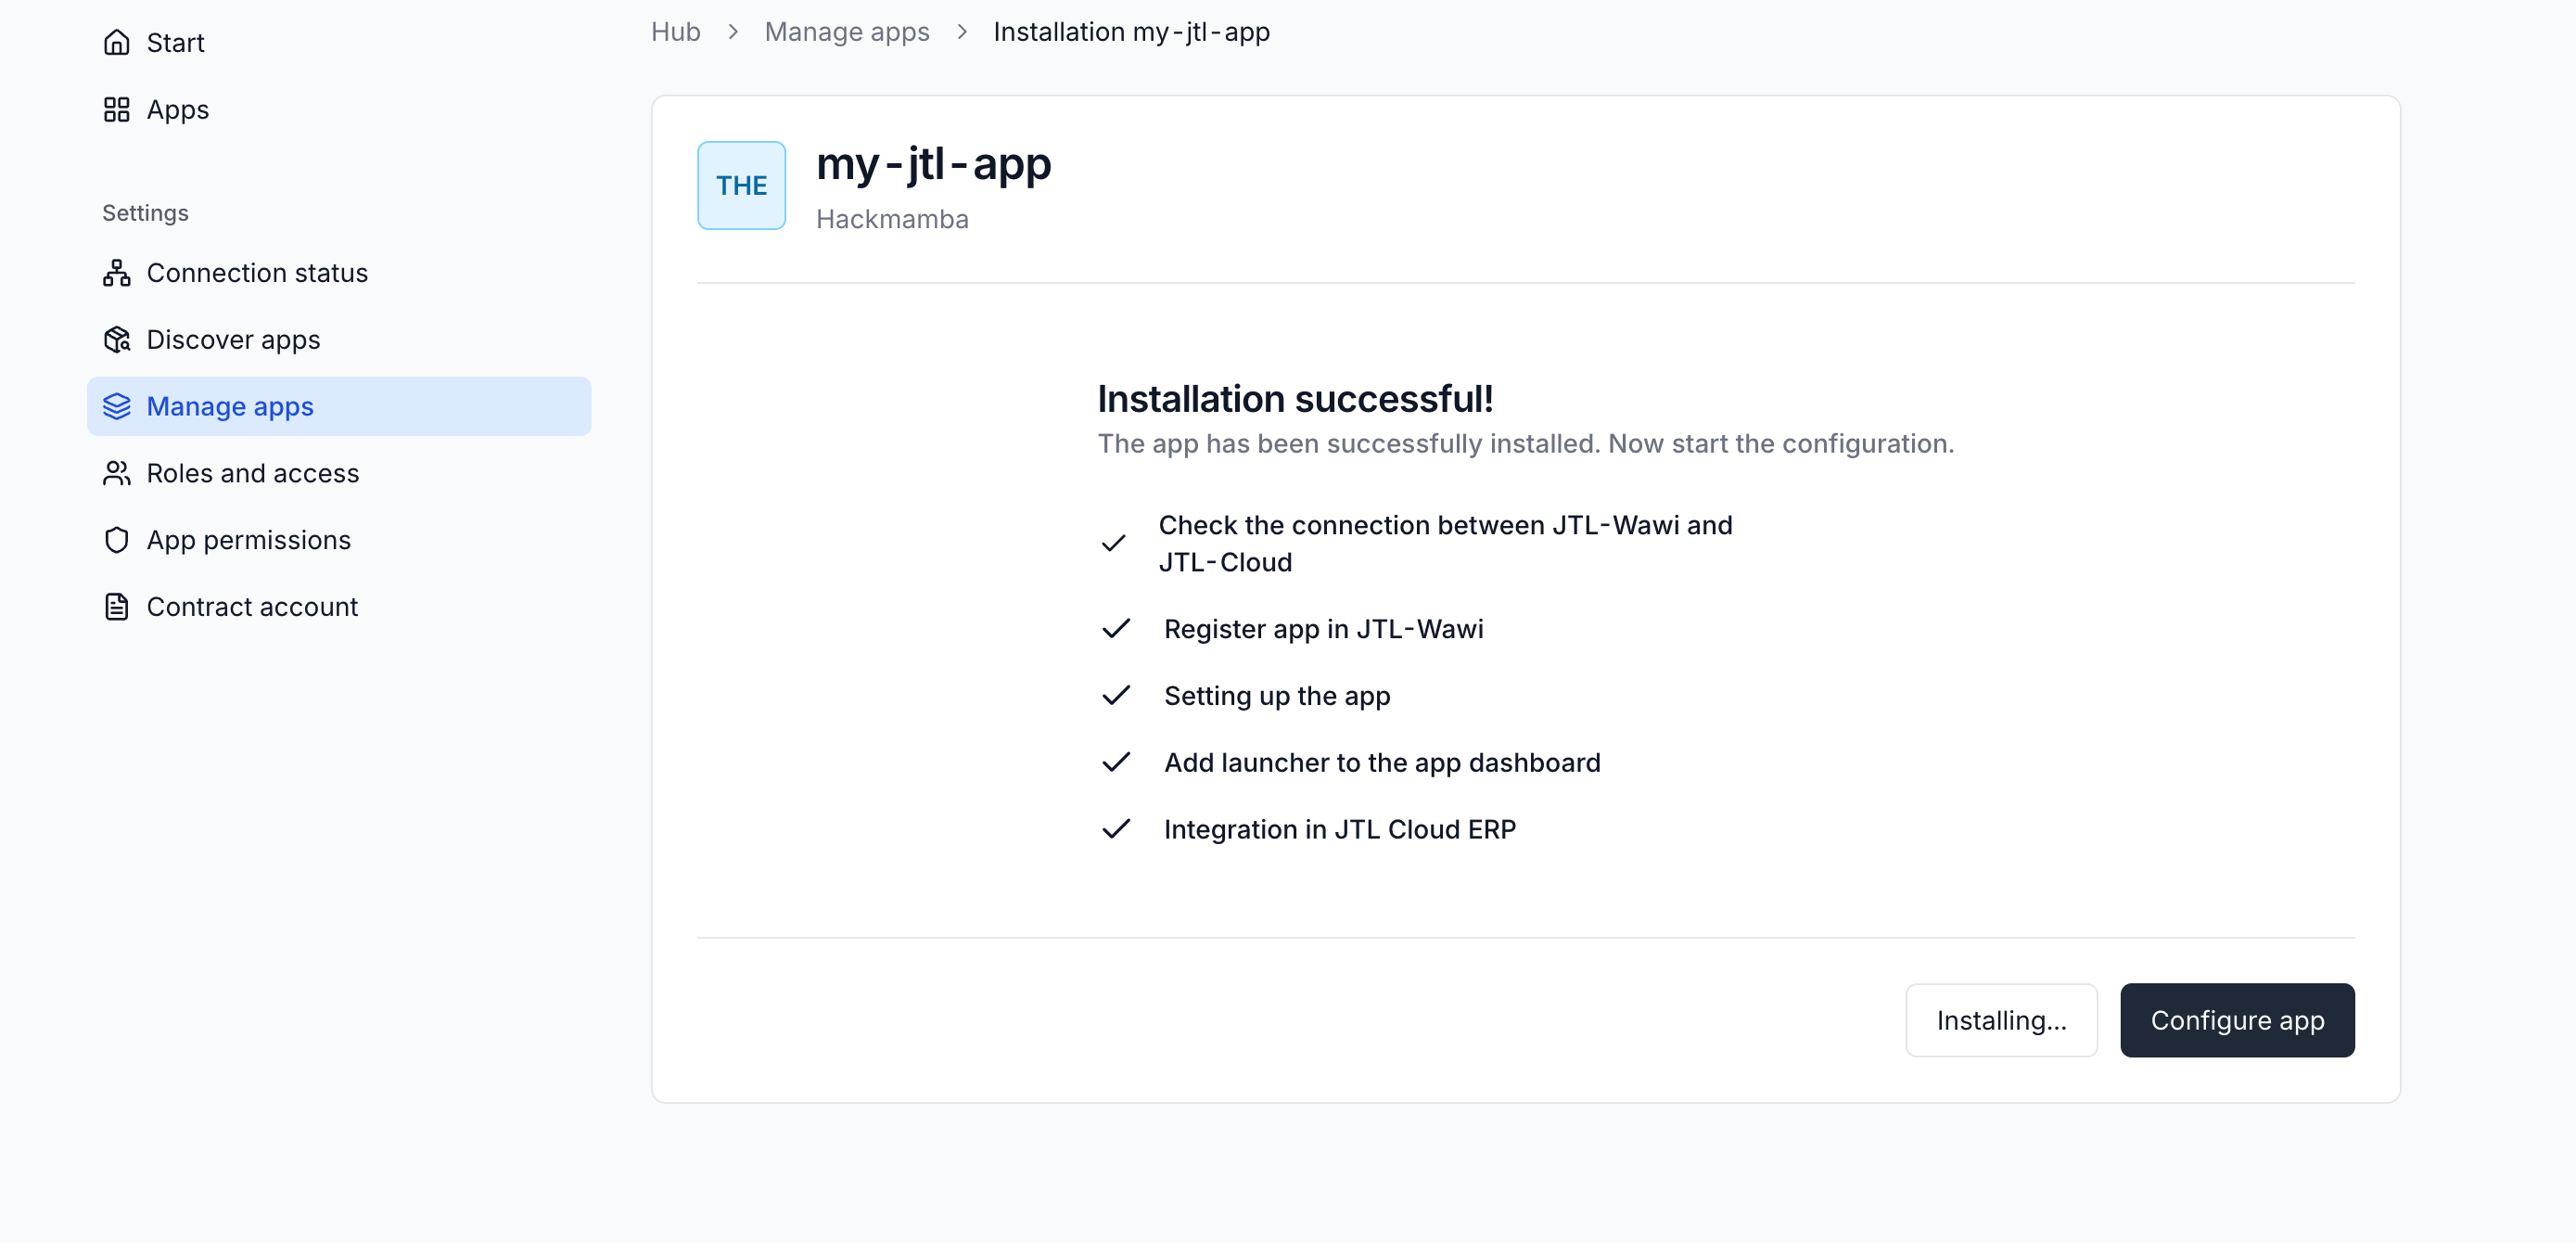
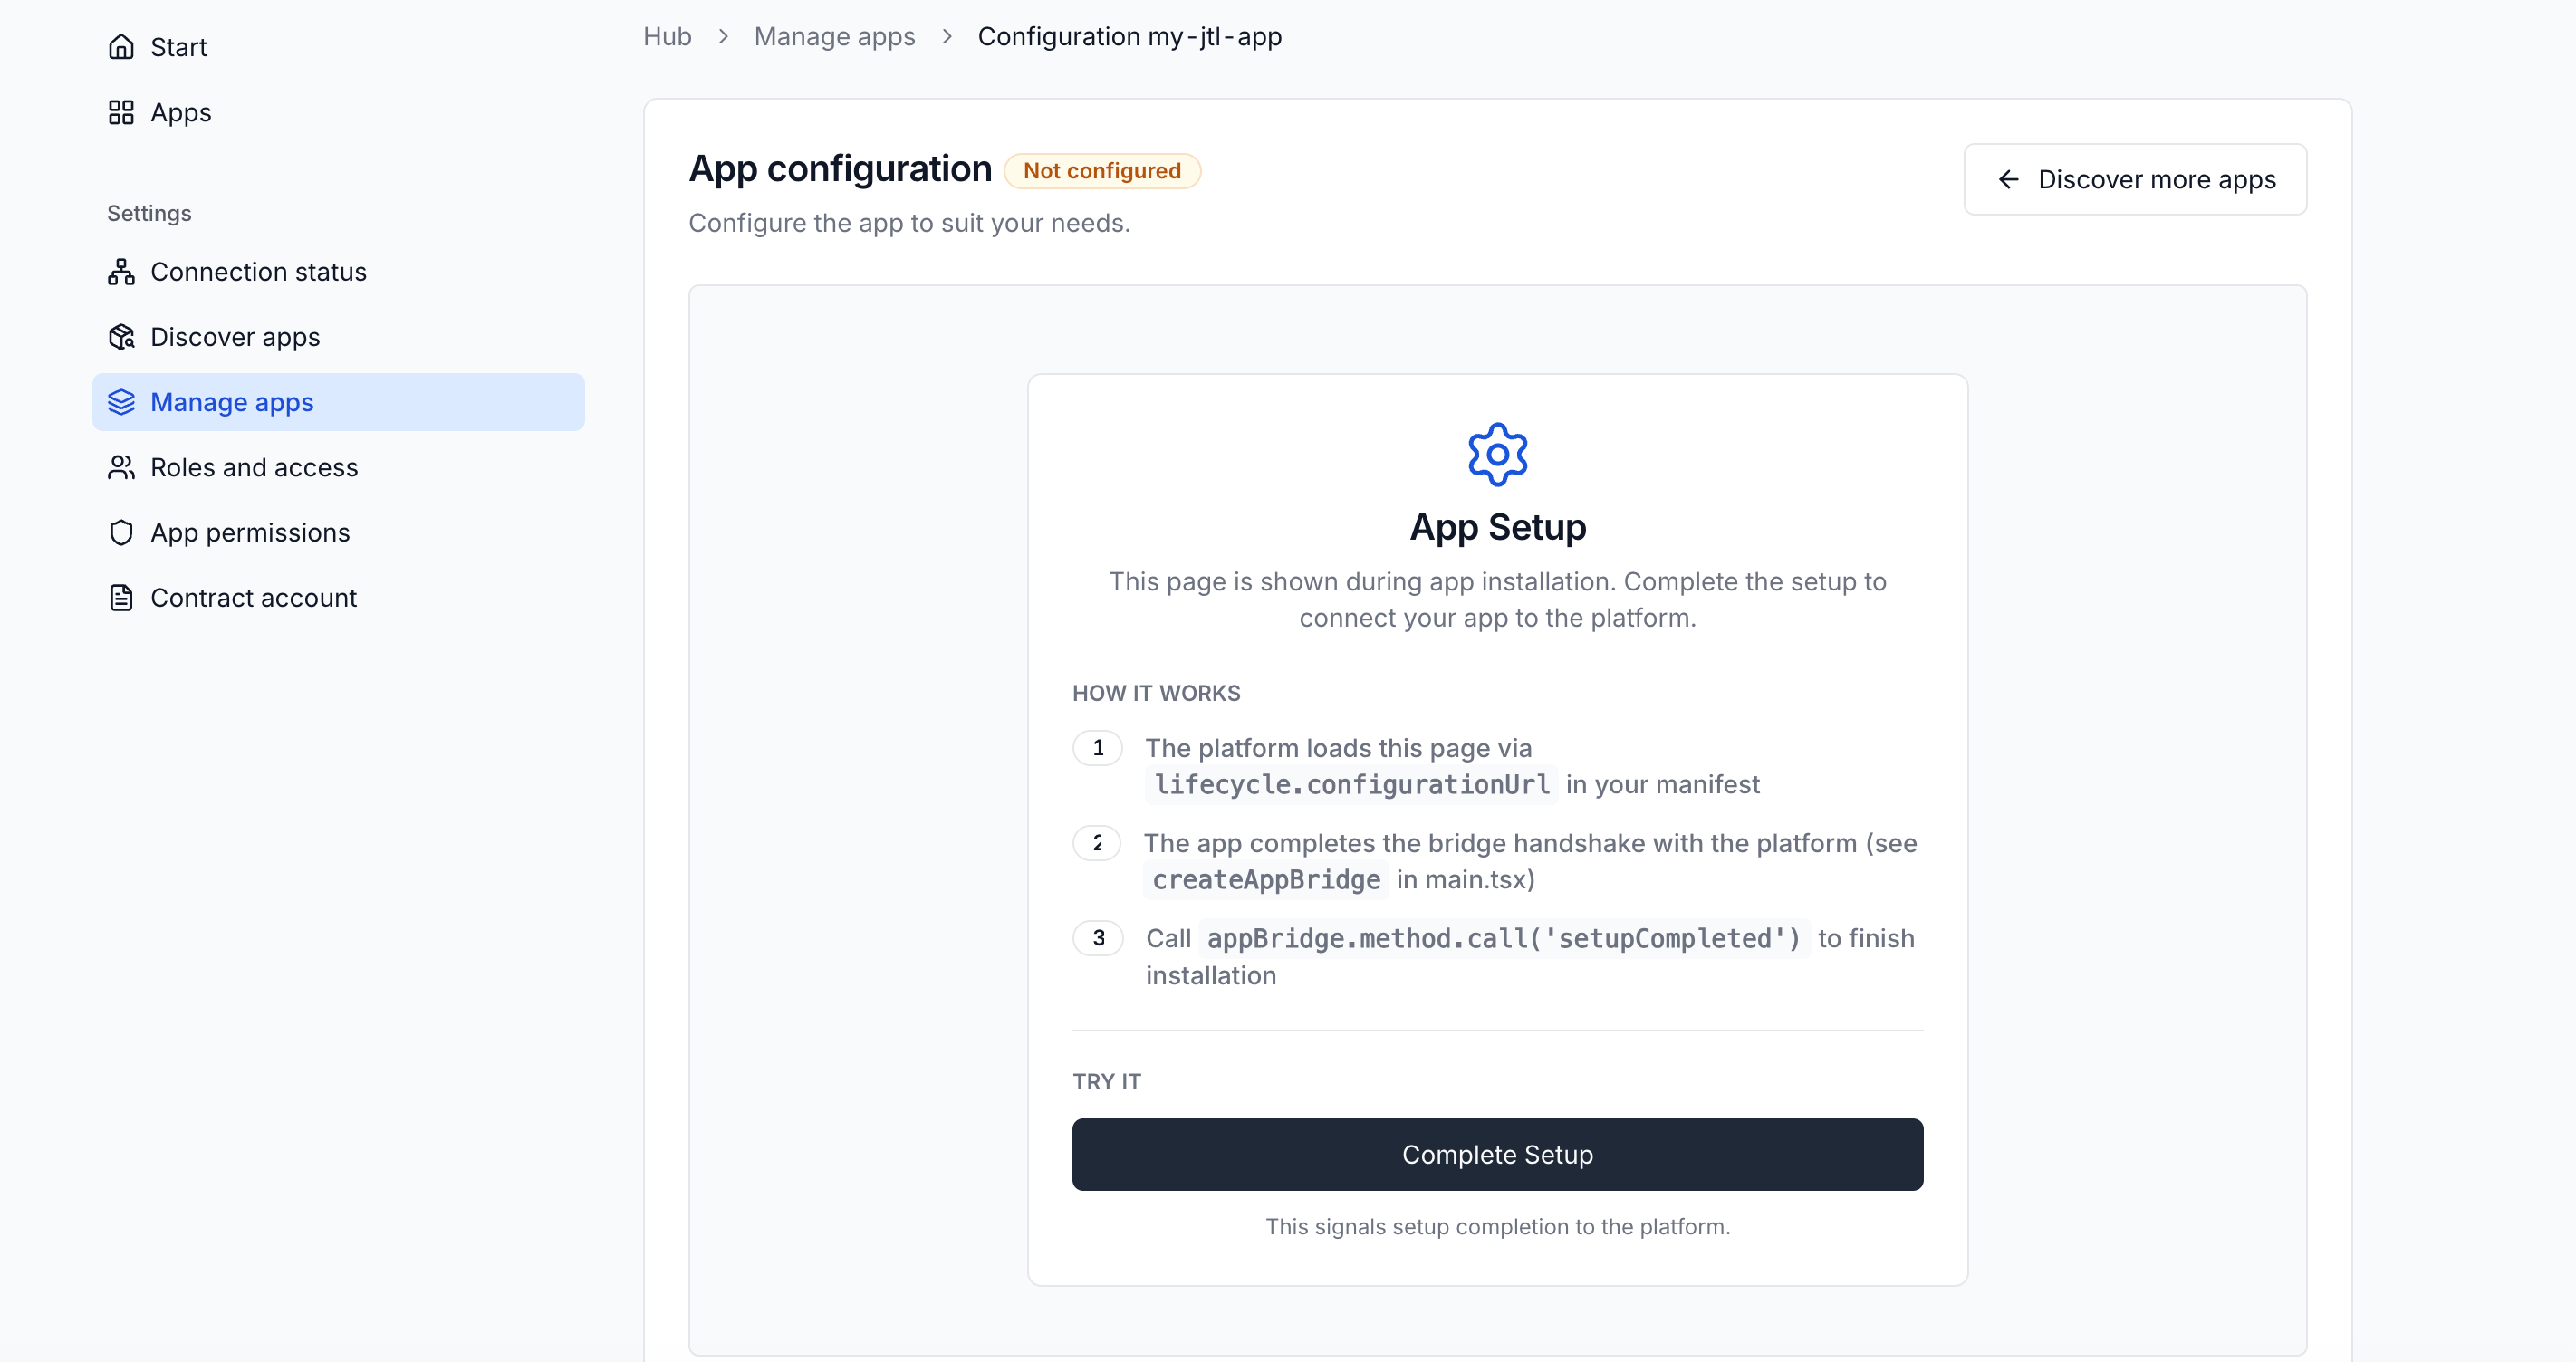
- Click the Install button to install the app. Once the app is installed, you’ll see a success screen with the option to configure the app. Click the Configure app button to proceed to the next step.
7. Fetch Data from JTL-Wawi
Your app is running and connected to the platform, but it’s not pulling real ERP data yet. The template includes a working demo page that queries Wawi through the ERP’s GraphQL API. Let’s walk through how it works.Open the GraphQL Demo Page
The template ships with a demo page atpackages/frontend/src/pages/graphql-demo-page/ that runs several example queries against your JTL-Wawi (items, orders, stock data).
To view it, see the Test your App guide.
How it Works
The frontend never talks to the JTL-Wawi API directly. All requests go through your backend, which handles authentication transparently. The backend’sPOST /graphql endpoint does five things:
- Reads the app token from the
Authorizationheader - Verifies the token and reads the tenant from its claims
- Obtains an access token using your app’s client credentials
- Forwards the GraphQL request to the JTL-Wawi API with the correct
AuthorizationandX-Tenant-IDheaders - Returns the response as-is
The template’s
/graphql proxy verifies the app token’s signature, issuer, expiry, and audience, which is enough to get started. Before deploying to production, add an authorization layer that checks the tenant and user against your own application data. See App Token Authentication for the full verification pattern.The Query Code
The demo page lives atpackages/frontend/src/pages/graphql-demo-page/GraphqlDemoPage.tsx. It keeps a QUERIES object with one entry per example query and runs whichever entry you click. topItems and stockOverview both query QueryItems. recentOrders queries QuerySalesOrders, which returns different fields.
Calling the API Without a Backend
The template also ships a serverless demo atpackages/frontend/src/pages/serverless-graphql-page/ServerlessGraphqlPage.tsx. It runs the same queries as the backend example, but calls the JTL-Wawi GraphQL API directly from the browser using an app token.
This demo runs a minimal query to verify the connection. The GraphQL API
supports filtering, sorting, pagination, and mutations. Explore the full
schema interactively in the GraphQL
Playground, or read the Using Platform
APIs guide for more patterns.
What Just Happened?
Here’s what’s running under the hood:- The React frontend renders your app’s UI (running on port 3004)
- The Express/.NET/PHP backend handles authentication and API calls (running on port 3005)
- The backend uses your client ID and secret to authenticate with JTL via OAuth 2.0
- Once authenticated, it can call the JTL-Wawi API to read and write data
Project Structure
Here’s what’s insidemy-jtl-app/:
Working with an AI coding tool? Connect the JTL docs MCP server,
then paste the prompt below to explore the project and extend it.
AI Assistant Prompt
Common Issues
Errors after npm install or npm run dev
Errors after npm install or npm run dev
The template requires Node.js v24.16.0 or higher (current LTS). Node 18 and earlier are known to fail during install or at runtime. Check your version with
node --version. If you need to upgrade, use nvm or download the current LTS from nodejs.org.Browser did not open during npm run register
Browser did not open during npm run register
The CLI tries to open your default browser to start the JTL ID sign-in. If your environment blocks that, the CLI prints the sign-in URL to the terminal instead. Copy the URL into a browser on a machine that can reach it. After you complete the sign-in, the CLI continues with the tenant selection and review steps.
Wrong tenant selected during registration
Wrong tenant selected during registration
If you registered the app under the wrong tenant, the simplest path is to remove the app from the Partner Portal and rerun
npm run register. The CLI prompts you to pick a tenant each time, so you can pick the correct one on the next pass.Port 3004 or 3005 already in use
Port 3004 or 3005 already in use
Another process is using the port. Find and stop it:
Authentication error (401 or invalid_client)
Authentication error (401 or invalid_client)
This usually means the credentials in your local environment file do not match the app registered in the Partner Portal. The fastest way to fix it is to rerun
npm run register, which regenerates credentials and rewrites the local file. If the problem persists, regenerate the credentials manually in the Partner Portal under your app’s client credentials, then update the file yourself.Empty data or null response
Empty data or null response
If you get
{ "data": null } or empty results:- Verify the
tenantIdis correct (check theurn:jtl:tenant_idclaim in your app token) - Confirm you have data in your Wawi for the query you are making
- Check that your GraphQL query syntax is valid (no missing brackets or commas)
What’s Next?
Your app is running. Here’s where to go from here:Test your App
Use the cloud environment to test your app with real (test) data.
Using Platform APIs
Use the JTL-Wawi REST and GraphQL APIs, handle responses, and work with
tenant-scoped data.
GraphQL Playground
Try queries and mutations interactively against your ERP instance.
Build from Scratch
Want to understand every piece? Build a Cloud App step by step.
Submit your App
Publish to the App Store, or share your app privately with activation codes.
App Shell & UI
Integrate deeper with the JTL UI using AppBridge and Platform UI components.